Monday, June 10, 2013

Sofia the First Dress!

Store bought princess dresses are always so glittery and seem to shred easily.  So when I saw that the Sofia the First Dress was all sold out from Disney, I was excited to try to make my own version without all the glitter but with just as much character.  Here is what I come up with. 

The fabric I used is a purple crepe found in the special occasion section of JoAnn.  I used a basic peasant shirt pattern that I embellished with purple cording and small white pompom trim.  I made the skirt portion of the dress separate and then attached it to the top.  I used 1/2 inch elastic in a casing on the inside of the waist to bring the middle of the dress in.  


To make the waist more comfortable for my little princess, I hand stitched the casing flat on the inside of the skirt. 


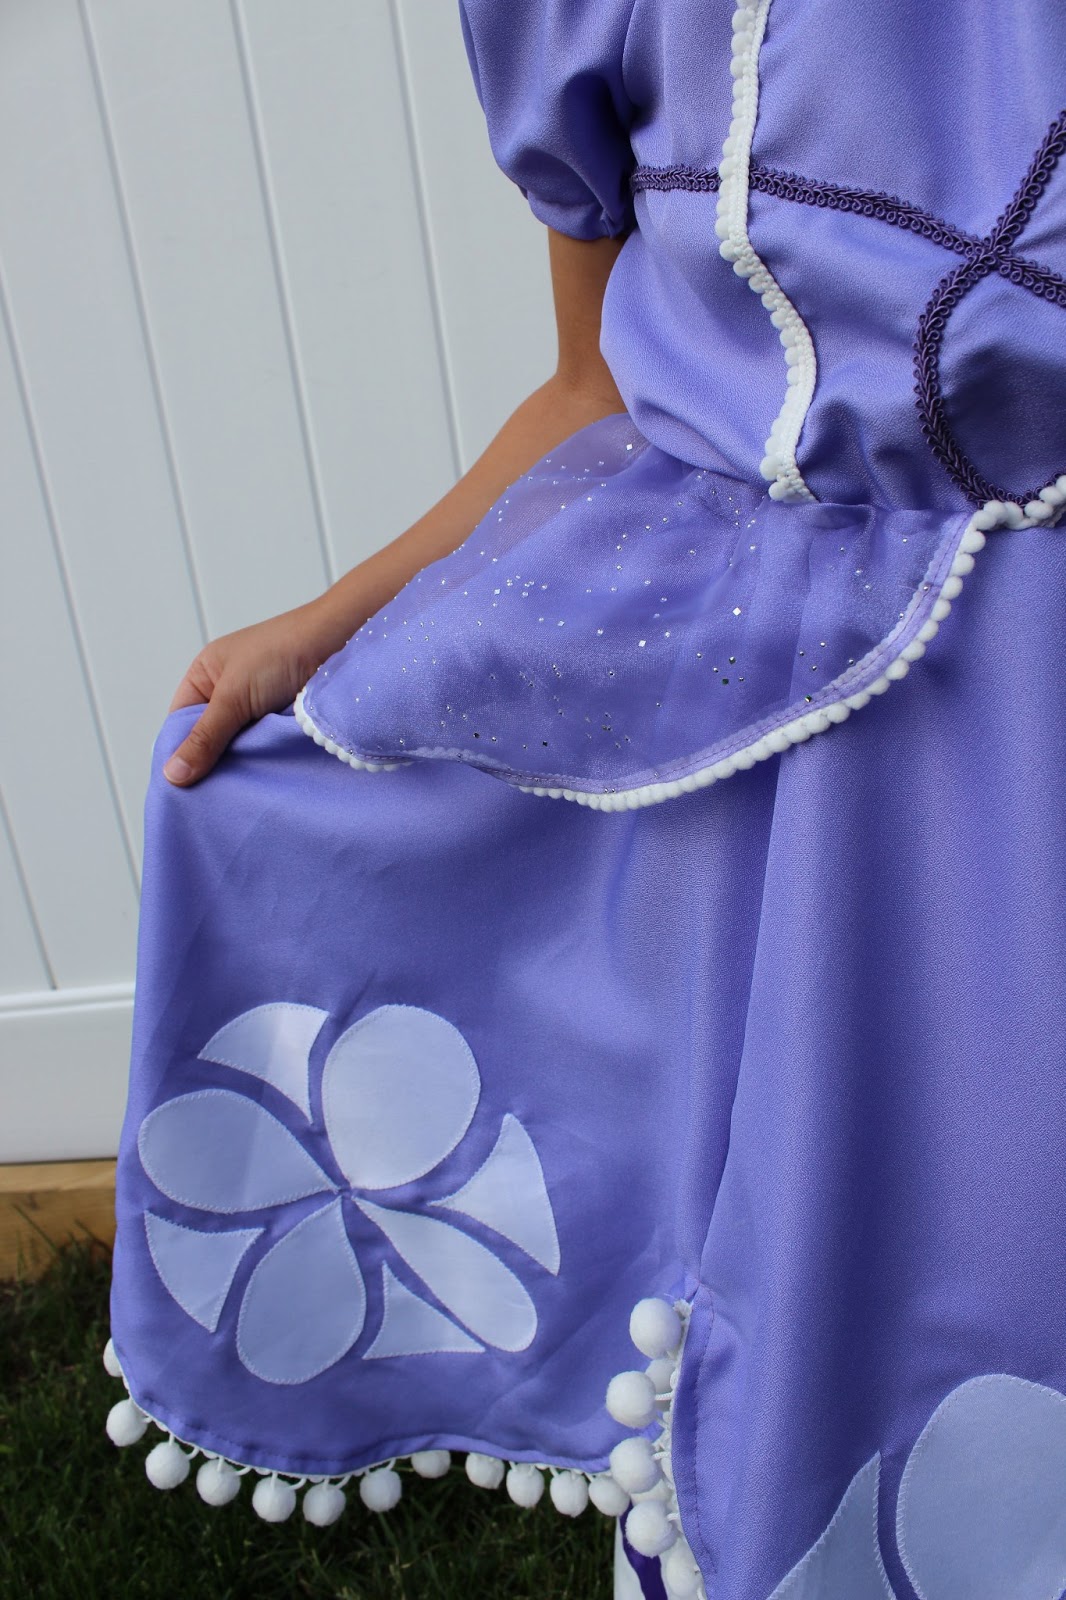
The skirt is made from 6 petal pieces.  Individually, I appliqued the white symbol to the bottom of each petal and added large ball trim to the hem.  Then I sewed the six petals together to form the skirt.  Once together, I topstitched the hem to secure the ball trim. 


I added the peplums made of a sheer sparkly purple material with small ball trim. I basted these to the bottom of the skirt before attaching it to the top. 


The underskirt is white broadcloth with purple ribbon sewed along the bottom.  This is not attached to the dress.  I hope you enjoyed looking at our Sofia the First Dress.  I've also made a Princess Amber dress that I'm hoping to post soon. 
 
Update:  It washes really well!  My daughter got grass and ketchup stains all over it and it came out of the washing machine good as new.  I used Clorox 2 on a gentle cycle and hung to dry.

I'm linking up with
 photo blogbutton_zpsb1fa0f6d.jpg 


Sumo's Sweet Stuff
Create and Inspire Link Party at Handmade Cuddles
 
Better Off Thread


http://www.seven-alive.com/


125

Friday, June 7, 2013

Liquid watercolors!

I'm realizing that this blog may be more than just sewing since we do all sorts of crafts in this house on a daily basis.  So today I'm going to tell you about how we make and paint with liquid watercolor.

A few weeks ago I took my almost 4 year old to an art class at Abington Art Studio.  My daughter made an amazing piece of art using liquid watercolors.  The teacher told me that I could get these bottles of liquid watercolor online or from a fine art retailer.  I figured I could make some out of the regular watercolors we already had in the house and it worked!  I mixed pieces of hard watercolor paint with warm water in containers and let my daughter paint.  She liked using droppers that I saved from old baby vitamins to paint and to mix colors.  Then I realized that I could use the bottle to store the paint and kicked myself for throwing so many away.


If you would like to make your own liquid watercolor, here is what I did.
Gather some regular watercolors.  $1 store stuff works great, just make sure it is non- toxic.  It doesn't have to be in good shape like the set on the left, I'm going to show you what I did to the green in the set on the right. 

Use the back of a paint brush or something hard to hammer at the paint.  Then pop out the crumbled up paint chips. 

Put the crumbly paint chips into an empty container or baby vitamin bottle with dropper lid.  Fill the container with hot tap water.  Screw the lid on tight and shake.

Once it is cooled, give to your child and let them create! 

I set up a few drops of colors for her to mix. 

Here is how it looked as she was blending them together. 

All three sets mixed.

The first time I made these I used small containers.  These allow for easy spills, we had a few.  However, the paint didn't dry out at all. 


She covered another paper in all red and yellow drops. 
 
Then she got out a paint brush and spread it all together.  The entire page was different shades of orange.  It made a really neat effect.
I hope you can enjoy some liquid watercolor art with the little ones in your life. 
 
Linking up at

Monday, June 3, 2013

Thank You!


Thank you so much to everyone who voted  for my signature look at Project Sewn over the weekend.  I also want to give a special thank you to all of my family and friends who dove into sewing blog land to vote for me.  I can't believe how many of you actually voted.  I'm shocked and elated.  Thank you, thank you, thank you!